How is the incubation of quail eggs


Now, for the convenience of a person, when breeding quails, incubators are used in which the most correct and suitable conditions are created for the maturation of eggs. As for quails, it is extremely important to preserve as many young stock as possible, since its further resale is a fairly profitable business. For babies, you also need to choose a cage, it should be very low. However, in order to obtain unusually tender quail meat, it is necessary to create the necessary conditions for the chicks, that is, this requires the incubation of quail eggs.
- How fertilized eggs are stored
- How to select eggs for incubation
- How to use an ovoscope and is it possible to do it yourself
- We place eggs in the incubator correctly
- What incubation modes exist
- The first stage of the incubation period
- Second stage of incubation
- The third stage of incubation
- What Factors Affect Incubation Success
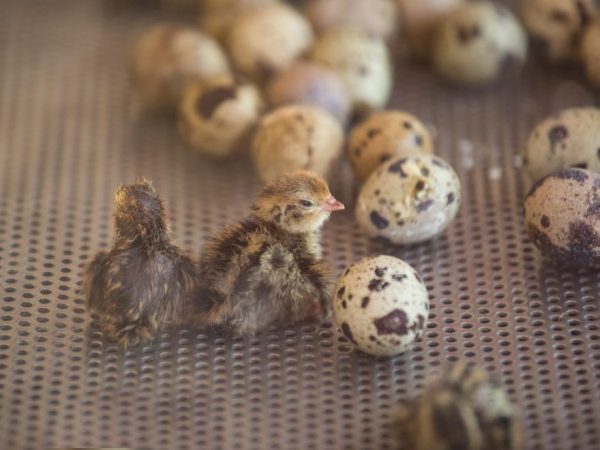
Incubation of quail eggs
The fact is that a quail female does not incubate eggs for a long time, therefore, under natural conditions, part of the young do not survive. If you use an incubator, that is, breed quails in an incubator, then in just 16-18 days, the offspring will hatch, while the losses will be close to zero, that is, they are low. What is the conclusion of quails in an incubator at home, which eggs need to be selected in order to breed healthy offspring, how they are laid, what are the modes of incubation of quail eggs, we will talk about these and other topical issues regarding the process of incubating quails and their breeding further ...
How fertilized eggs are stored
In order to select the necessary material for incubation, you need to pay attention only to those eggs that were laid no later than seven days (no older than a week). In order for the incubation process to be successful, some standard conditions and requirements must be adhered to.
- For storage, only rooms without access to sunlight are suitable, the incubation temperature of quail eggs should be constant and unchanged, ranging from 37 to 38 degrees, while the humidity indicators should correspond to 50-75%. Also, do not forget that the storage room for quail eggs must be periodically ventilated without creating a strong draft.
- It is strictly forbidden to direct sunlight into the room in which the quail eggs are stored, otherwise it will be impossible to hatch the eggs. When the incubation of quails is carried out, the temperature regime is checked, the period of full incubation of the quails is controlled. Regardless of how many eggs are in your incubator, you need to gently turn each one twice a day. This is to prevent the embryo in the shell from sticking to the inside of the shell. The incubation of quails without a coup is impossible.
- the period of full incubation of quails is 18 days, it is believed that during this time the quail will hatch. In some cases, it is advisable to increase the incubation time to a maximum of twenty days (almost three weeks).It is important to note that each egg, before entering its incubation cell, undergoes a disinfection procedure for several hours so that there is a sterile environment in the egg storage room, this is the only way to hatch quail chicks.
How to select eggs for incubation
As mentioned earlier, not all eggs are subject to incubation, it is important to select exactly those that meet the requirements for this procedure. First of all, you need to understand which of the testicles are fertilized, since this is the category you need. Also, when selecting, other external characteristics are assessed, such as weight, shape, color of the shell, it is also important how to store quail eggs correctly for incubation. Let's describe the stages of selection in more detail:
- We estimate the weight
The mass of the egg to be incubated should not be less than 9 grams, while not exceeding the 12 grams mark. These requirements apply to those quails, which in the future will be grown only as layers. If meat breeds are subject to incubation, then the weight of the incubated egg increases to 13-17 grams.
- Shell color
The color of the hard shell of the egg should not be faded, the norm is a moderately variegated color. Although an egg that is too bright or too gray should be discarded, since, with a high probability, the chick from such an egg will not hatch, its hatching is impossible.
- Testicle shape
The shape of a quail egg should have smooth edges and resemble an oval. If you see some other geometric shape, such as a circle or an irregular oval, you should think about rejecting such units.
- The outside of the egg
The quail testicle should not be rough to the touch, the norm is a smooth surface, without pits and scuffs.
- The presence of an embryo
It is logical that a chick can only hatch from a fertilized egg; the owner will have to check each testicle for the presence of a chick embryo in it. How to do it? To do this, you will need to purchase a special apparatus called an ovoscope, with its help you can illuminate the shell and see the filling of the egg. How to use it will be discussed further.
How to use an ovoscope and is it possible to do it yourself
As mentioned earlier, an ovoscope is a special device that allows you to determine at home at what stage the chick is in the shell, and also tells you with accuracy whether a particular testicle taken is fresh. In order to answer all these questions, you need to connect the device to the power source, then put the quail eggs in the incubator on a special stand and carefully examine the biomaterial. You yourself will understand whether there is an embryo in a particular egg taken or whether it is a dummy.
However, many poultry farmers, especially if their farm has a small number of quails, try to save money on buying an ovoscope and make it on their own using improvised means. We will figure out how to make an ovoscope with our own hands at home. You will need cardboard from which you need to build a cylindrical structure. A hole is made at the end of the future device, into which an incandescent lamp is inserted afterwards, its power must be at least 150 watts. The homemade ovoscope is ready to use.
Before you try it in action, you need to thoroughly disinfect the eggs, as well as wash your hands with soap, this will protect the not yet fully formed shell from bacteria. For disinfection, a weak solution of potassium permanganate is used, exposure to eggs with ultraviolet radiation for half an hour or spraying of the biomaterial with special chemicals that can be purchased at pharmacies. Only then start the inspection.
During inspection it is important not to break the shell above the shell, as its role is extremely important for the developing chick.What can be seen in an ovoscope? The result of the inspection will be an assessment of the state of the air chamber, the presence or absence of defects in the shell, the presence or absence of an embryo, the presence of blood inclusions, and so on. There are a lot of photos and videos describing this process, you can familiarize yourself with them.
We place eggs in the incubator correctly
Before tackling the direct placement of quail eggs in the incubator, you need to thoroughly wash the apparatus, carry out its complete disinfection and process the room with a quartz lamp. Also carry out a preliminary technical inspection, paying sufficient attention to the following aspects:
- Thermostat operation (responsible for cooling and heating)
- Water load
It is advisable to conduct a test launch of the system in order to identify possible violations at one stage or another. After that, proceed to bookmarking.
The number of eggs will depend on the capacity of a particular incubator, this will also determine the type of setting - vertical or horizontal. If a vertical position is provided, then the egg should be located with the sharp end down; in the horizontal position, the selected eggs simply lie on the surface of the net (the net is supplied in the kit). It is important to carefully study the instructions for your device and do everything as indicated in it, and use the device correctly.
What incubation modes exist
As mentioned earlier, the maximum finding of quail eggs in the incubator (incubation) should not exceed 18 days, then the chicks hatch. This time period is divided into three stages of incubation by day. It is important that during each stage, none of the indicators of the incubator changes, as this can adversely affect the process of hatching. The temperature of the quail incubation chamber must be stable. Here is a summary of all three stages in the quail incubation table:
| Stage | How long is the stage, day | What temperature should be in an incubator for quail eggs, degrees Celsius | Air humidity, in% | The required number of turns, once a day | Airing, minutes per day |
| 1 | 3 | 37,8 | from 55 to 65 | from 4 to 5 | not required |
| 2 | 10 | 37,8 | in the region of 50-55 | from 4 to 8 | 2 times a day, duration about 15 minutes |
| 3 | 5 | 37,4 | from 60 to 75 | not required | not required |
This table of incubation of quail eggs will come in handy for novice poultry breeders who have decided to breed quail recently. In order to understand the division into stages or modes of incubation, we will describe each incubation mode and its features in more detail, starting with the very first.
The first stage of the incubation period
As already indicated in the table, the duration of the first incubation mode is not long, equal to 3 days. At the same time, during the first incubation period, a constant temperature in the incubator for quails should be maintained - 37.8 degrees, the humidity indicator should not drop below 55%, and also exceed 65%. At this stage, additional ventilation is not necessary, which is not the case for overturning. You must take each egg and turn it over to the other side, and remember to wear sterile gloves on your hands.
Second stage of incubation
The second stage lasts longer - and is equal to 10 days, at this time there is a rapid growth of the embryo, it is strictly forbidden to reduce its duration. At this time, you need to change the settings in the incubator by changing the temperature and humidity indicators to the parameters indicated in the table above. Turning overs are still necessary, now their number increases up to 8 times per day.
However, this only applies to those eggs that were laid horizontally. If your incubator assumes vertical laying, then all you need to do is tilt the device at an angle of 45 degrees.It is important not to forget about the need to ventilate the incubator, now the procedure must be performed twice a day (day) exactly 12 hours later, the duration will be 15 minutes.
The third stage of incubation
The final stage is 5 days, that is, less than a week after that, babies appear. At this time, the storage conditions for eggs also need to be revised, both temperature and humidity change. Such changes will help to make the shell softer, which will allow the chick to hatch on its own.
As you know from the table, the third stage does not imply that you have to periodically turn the eggs, but at the very beginning, that is, on day 13, you need to put all the eggs on their side, regardless of how they were located earlier. A sterile diaper can be placed on the bottom of the incubator to minimize trauma during hatching. The fact is that quail chicks are born very tiny, are extremely helpless and can easily harm themselves.
When can you take out (take out) chicks from the incubator, that is, to hatch? It usually takes about two days for small quails to dry, after two days you can pick them up and transfer them to cage keeping and further growing.
What Factors Affect Incubation Success
If you approached the issue responsibly, followed all the requirements for incubation (correct adjustment), with a high percentage of probability, you will get almost one hundred percent offspring. However, it also happens that the equipment fails, there are drops in the supply of electricity, and so on, that is, these are reasons that did not depend on you. However, there is a group of other reasons that can also cause incubation failure, including the following:
Insufficiently balanced nutrition of layers, the bird did not receive enough vitamins and other vital substances during feeding;
- An error was made at the stage of selection of quails for incubation
- Incorrect machine settings have been selected
- You forgot to turn or ventilate the incubator
If you did not wait for the chick to appear after the standard period, that is, after 18 days (about 2.5 weeks) the chick did not hatch, we can say that the incubation of quail eggs at home was unsuccessful. Do not rush to throw away the spoiled biomaterial, as its further study will help answer the question of what went wrong. Find out what is most often the cause of unsuccessful incubation hatching:
- A dummy egg, that is, an unfertilized one, was taken to the incubator;
- The embryo died. Moreover, experienced poultry farmers can suggest the cause of death, based on the results of the ovoscope. It is important to determine at what stage of incubation the error was made. If this is the first period, then a blood ring will be visible in the lumen; if the second is a frozen underdeveloped embryo; if the third, you will see a practically formed chick that died.
In order to facilitate the work of a person, it is recommended to make written notes about carrying out this or that manipulation, something like a daily calendar to comply with the regime. To do this, a table is placed next to the incubator - a graph indicating the list of manipulations and the time period when they were performed. Although it should be said that this is not always necessary, because incubators are currently being sold in which minimal human intervention is needed, since both coups and ventilation take place automatically, in accordance with the specified mode and period of operation. All you need is to provide an uninterrupted supply of electricity for the circuit to work, everything else happens automatically.
Now you know how the incubation of quails occurs at home, you know about its features, what rules you need to follow in order to get the maximum number of offspring. From the above information, we can conclude that incubation is not a difficult process and was invented in order to help a person in poultry farming, making the quail breeding period as accessible and simple as possible. It can also be concluded that an automatic incubator is the most convenient for use, and the presence of an ovoscope will also not be superfluous.