When and how to plant pumpkin seedlings

Properly grown pumpkin seedlings are the key to a good future harvest. This method is used mainly by gardeners in regions with an unstable and cool climate.
- Seed preparation
- Calibration
- Germination
- How to increase germination
- Landing technology
- Timing
- Seedling containers
- Substrate
- Technology
- How to care for planted seeds
- Temperature
- Watering
- Top dressing
- Lighting
- Hardening
- Picking
- Diseases of pumpkin seedlings
- Blackleg
- Bacteriosis
- Root rot
- If the seedlings are stretched out
- Deepening sprouts
- Transplanting seedlings into the ground
- Transplant technology
When and how to plant pumpkin seedlings
Seed preparation
Growing pumpkin seedlings includes the selection of high-quality seeds, their pre-planting preparation and sowing directly into the substrate.
Calibration
The largest seed in the batch should be sown. To assess the quality, calibration is carried out:
- the seed is soaked for 5-10 minutes in a saline solution with a concentration of 3%;
- floating seeds are removed as low-quality;
- those remaining at the bottom are thoroughly washed in running water and dried at room temperature.
Germination
Before planting seeds, they should be soaked and germinated:
- initially for 2-3 hours in water heated to 45 ° C;
- wrapped in a damp gauze cloth and germinated at room temperature for 2-3 days, regularly moistening.
How to increase germination
When preparing for planting pumpkin seeds for seedlings, gardeners often resort to additional measures:
- a weak solution with potassium permanganate, in which the seeds are soaked for 20 minutes, allows disinfecting the seed material and protecting future seedlings from infections;
- seeds previously soaked in Epin sprout faster;
- help to increase the immunity of future sprouts of micronutrient fertilizers: the seeds are sprinkled with wood ash before being placed in the fabric or by pre-soaking in an ash solution (1 tablespoon per 1 liter of water);
- to increase the cold resistance of seeds in some varieties (for example, nutmeg and ornamental pumpkin) before planting on seedlings, their hardening allows them to harden: the hatched seeds, wrapped in a damp gauze cloth, are placed on the lower shelf of the refrigerating chamber for a period of 3 to 5 days.
Landing technology
Timing
Seedlings are grown for 20-25 days, an overgrown pumpkin (from 30 days) takes root for a long time in an open garden.
In the middle lane and central regions, it is better to plant seedlings in the ground from mid-May.
For Siberian regions and in areas with similar climatic conditions, planting dates begin from the first third of June.
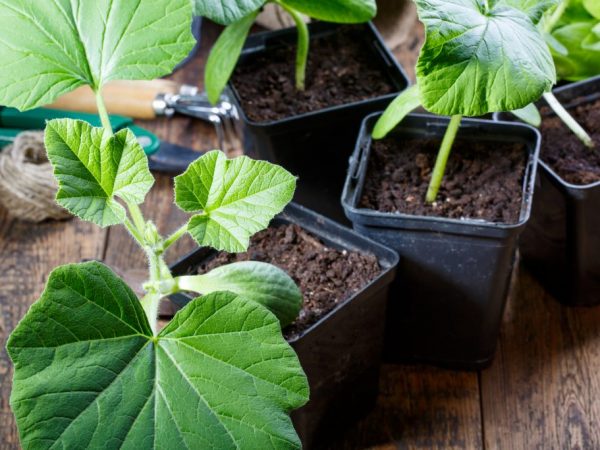
Seedling containers
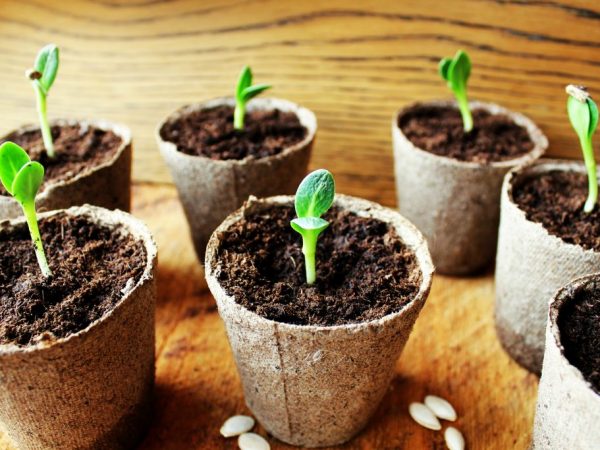
Peat pots are suitable for planting.
The pumpkin does not like frequent transplants, therefore seed material is grown in individual peat pots. It is best to plant in containers of 6 cm or more.
It is not recommended to use simple wooden boxes, because when removing grown seedlings from it, there is a great risk of damaging young immature pumpkin roots.
An alternative to a ready-made peat pot is a paper container, which will subsequently be easy to remove from the substrate without damaging the root system.
Substrate
For pumpkin seedlings, they purchase a ready-made substrate or prepare it at home on their own:
- 2 parts of peat mixture;
- 1 part sawdust;
- 1 part leaf humus;
- 1 tsp nitrophosphate per 1 kg of finished substrate.
Also, the one that is intended for planting cucumbers is good.
Technology
The prepared containers are filled with the selected soil soil, the substrate is spilled abundantly with warm water.
Pumpkin seeds are buried 3-5 cm.
When growing pumpkin seedlings in wooden boxes, their bottom is first strewn with sawdust with a layer of 3-4 cm.The scheme of planting in a total container is 15 * 15 cm.
When filling the containers with the substrate, a reserve is made for the subsequent addition of future sprouts, which are prone to stretching. Adding soil allows young seedlings to grow stronger.
How to care for planted seeds
Caring for the planted seeds includes creating a favorable microclimate and carrying out a number of measures to prepare future pumpkin seedlings for planting in open ground.
Temperature
When growing seedlings in a greenhouse, on a balcony loggia or at home, sowing containers are placed in places where direct sunlight hits, from the south side of the room.
If, after sowing, the temperature is maintained at 18 ° C-25 ° C, the first shoots appear on the 4th-5th day.

Seedlings need sunlight
After that, the temperature is lowered for 5 days by 3-5 points, arranging regular ventilation in closed rooms and structures.
This procedure prevents the seedlings from pulling out.
Further, the temperature is kept at the level of 20 ° C - 22 ° C during the day and 15 ° C - 18 ° C at night, the seedling containers are removed from direct sunlight.
Excessive heat provokes wilting of seedlings, low temperatures stop their growth, and the sun causes burns.
Watering
Young seedlings require regular, but moderate watering, which does not allow either drying out or excessive waterlogging of the substrate.
Excessive irrigation provokes the appearance of fungal infections.
Watering the seedlings is recommended in the afternoon. This will allow them to assimilate the resulting water, and its excess will have time to evaporate without harm to young shoots.
Top dressing
The initial top dressing is applied in a week.
To do this, use a weakly concentrated infusion of mullein in liquid form, dilute it with water (1:10), or nitrophos with a concentration of 1.5%. The consumption rate of liquid fertilizers is 200 m for every 20 cm² of the substrate.
The second feeding is planned shortly before transplanting seedlings into open ground. More often, ready-made universal complexes suitable for melons and gourds are used as fertilizer.
You can prepare a fertilizing top dressing yourself:
- 0.5 l mullein;
- 1 tsp ammonium sulfate;
- 1 tsp potassium sulfate;
- 0.5 tbsp superphosphate;
- 5 liters of water.
Consumption rate - 10 sprouts.
Lighting
When sowing containers are placed on the south side of the room, natural light will be enough for the full development of seedlings, they do not need additional lighting.
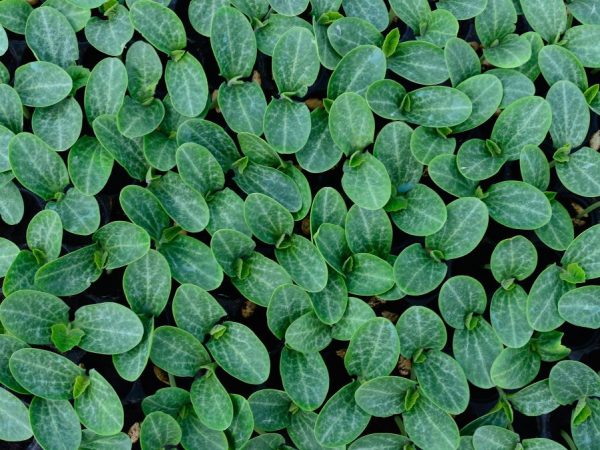
As the seedlings grow, the pot containers are rearranged and moved apart to ensure an even supply of light.
In the absence of the opportunity to place the pots in places well-lit by the sun for several hours a day, they turn on additional artificial lighting, using fluorescent lamps.
Hardening
Tempering helps to shorten the onset of the flowering and fruiting stages of the pumpkin.
At home, the seedlings are hardened by taking them to a cool place (for example, to an open balcony), leaving them for 2-3 hours each time (within a week).
For the second week, the time spent in the coolness of the seedlings is increased to 4-5 hours.
2 days before the expected date of transplantation, the seedlings are left in the fresh air for a day.
Picking
The pumpkin does not like transplanting, therefore, it does not need a pick, and the seedlings are transplanted into individual containers.
Young shoots must be dived
When growing seedlings in a common sowing box, a pick is needed for young shoots. Usually, out of 3 possible ones, one of the strongest is left, or plantings are thinned out by resettling excess shoots into new insulated containers, extracting with an earthen lump.
Diseases of pumpkin seedlings
Most often, when growing pumpkin seedlings, gardeners are faced with infectious diseases.
Blackleg
When infected, the root collar of young seedlings becomes brown and decays, as a result of which the plant dies.
The reasons for the appearance of a black leg are an excess of moisture during watering or infected substrate and seeds.
Prevention of the disease of young shoots is pre-planting disinfection of the substrate by freezing on the balcony for 2 months or calcining in an oven at a temperature of 200 ° C for 2-3 hours.
An additional disinfection measure is also spilling the substrate with hot potassium permanganate of low concentration and soaking the seeds in it.
Bacteriosis
Bacterial infection of young shoots manifests itself in the form of brown lesions. Bacteriosis appears due to a sharp temperature drop and excessive watering.
When growing seedlings in individual containers, they are isolated from healthy ones and try to heal at the initial stages of the development of the disease by spraying with Bordeaux liquid.
The seedlings grown in the common seed box are not treated, but must be destroyed.
Root rot
Weak shoots are prone to root rot. The main reason for the appearance of the disease is an excess of moisture and temperature changes. The roots of the seedlings turn black and stop developing, the leaves turn yellow, which is very bad for a young plant (it dies over time).
If the foliage has turned yellow on the seedlings, it is worth checking the roots for rot.
Prevention of the appearance of root rot is a slight loosening of the substrate and regulation of the amount of irrigation, while it is forbidden to use cold water for irrigation.
Seedlings affected by root rot are destroyed, and the remaining healthy specimens are sprayed with Bordeaux liquid.
If the seedlings are stretched out
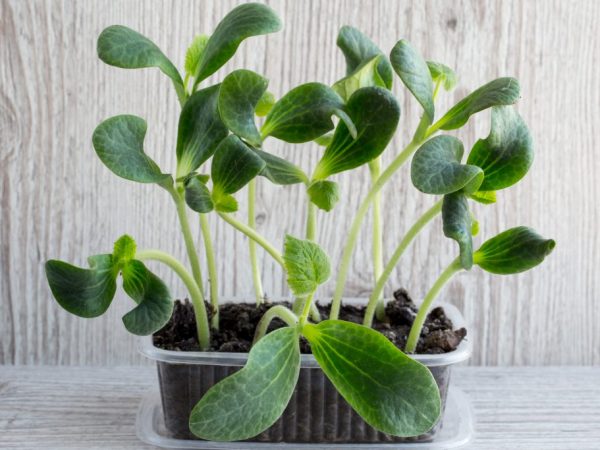
Poor grooming leads to problems
Failure to comply with the temperature regime during the period of active growth of seedlings, as well as excessive watering or its lack, lack of sunlight, thickening often lead to its stretching. Saplings grow rapidly in length, but at the same time they become weak and thinned.
If the young shoots are stretched out, on the 8-10th day after their first appearance, the hypocotal knee of the seedlings is rolled up in a ring, laid out on a substrate and sprinkled with soil to the level of the cotyledon leaves.
The seedlings are poured at the bases with soil, under which new lateral roots will form, stopping the excess growth of the stems.
Deepening sprouts
It is not recommended to deepen extended pumpkin seedlings. This vegetable culture prefers warmth, because if young seedlings are buried, they will begin to rot in moist soil.
Transplanting seedlings into the ground
Heat-loving pumpkin is planted in open ground when the temperature reaches 16 ° C and above.
The optimal growing conditions are 20 ° C, for nutmeg and ornamental varieties - 23 ° C.
By this time, 3-4 true leaves are formed in the shoots, the stems of the seedlings to be transplanted should be short (up to 15 cm in length) and strong, with a small distance in internodes.
The best precursors to pumpkin will be carrots, beets, beans, cabbage and onions, and the unsuccessful ones are the related melons, potatoes and sunflowers.
Before transplanting, the soil is dug up, simultaneously introducing 4-5 kg of compost or manure per m². Lime or wood ash (200 g / m²) is added to the over-acidified soil.
They increase the fertility of the land by introducing phosphorus and potassium in the form of fertilizer, 30 g and 20 g, respectively, per 1 sq. M of planting area.
If the soil could not be prepared in advance, when transplanting, the holes are spilled with hot water and 5 liters of humus are added, 1 tbsp. superphosphate and 0.5 liters of wood ash.
Transplant technology
Proper sprouting of seedlings at home is the key to a future pumpkin harvest, but you also need to observe the technology of planting in open ground.
When transplanting, each seedling is transferred from the sowing container, separating it together with an earthen lump, or dug out with it from the common sowing box. Together with the earth, they are placed in the hole, covered with soil and tamped.
Seedlings are planted deeper than they grew in sowing containers and sprinkled with soil to the level of growth of cotyledon leaves, which will contribute to better rooting and the formation of new roots.
When transplanting, the depth of placement of pumpkin roots is 10 cm. If the seedlings at home have outgrown, the elongated and overgrown shoots are not buried, but planted at an angle, placing the tops of all seedlings in the same direction.
After planting, the seedlings are watered and mulched abundantly.