Watering home phalaenopsis orchids


Watering phalaenopsis is different from irrigating other types of houseplants. Orchids are representatives of the tropics and belong to the genus Epiphytes. Plants collect moisture from the air, not from the potting medium. That is why orchids only need water in the form of vapor.
Watering Phalaenopsis orchids
Ways and methods of watering orchids
Watering phalaenopsis at home is done in several ways, among which are:
- basal;
- immersion in containers;
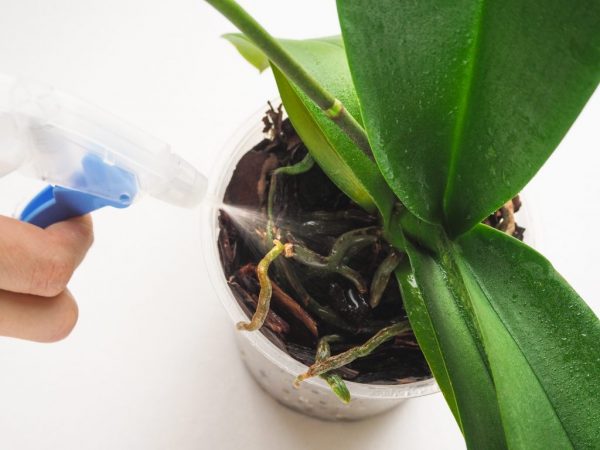
- spraying;
- creation of natural conditions using an aquarium or other artificial mini-reservoir.
Each type of irrigation has its own rules. Preference for one or another option is given depending on the situation and the need for moisture at certain periods of the life of epiphytes.
Irrigation features
Orchid care involves a small number of operations, among which irrigation takes the first place. The peculiarities of this process are rationing and regularity.
The amount of moisture depends on the following factors:
- Condition of the roots and woody filler of the flower container. Darkening of shoots or moldy soil is an indicator of excess water. Dry soil is lighter than moist soil, and also crumbles in hands. Dehydrated shoots become silvery.
- Epiphyte behavior after irrigation. Too juicy leaves, drops on aerial roots that rise above the pot, or the appearance of aphids on the underside of the leaf indicates high humidity or poor quality of the liquid.
- Pot weight. Excess water is confirmed by the unnatural weight of the vessel.
Correctly water phalaenopsis with water of a certain origin:
- rain;
- spring;
- thawed.
To soften tap water, use biologically active additives that are available in floriculture shops. It is allowed to use filtered tap water, settled in an open container or boiled water.
After the purchase
The purchased flower needs quarantine measures for some time, because it can be a source of infection or a carrier of pests. That is why the first irrigation after purchase will have to be done away from other epiphytes. Better yet, keep the "rookie" in a separate, closed room.
The flower will acclimatize throughout the week. All this time, the irrigation regime should be the same, but it is not worth watering the epiphyte too often. The best solution would be to spray the soil with a spray bottle. In this case, it is easy to add a little antiseptic for indoor flowers to the liquid for the first watering, the same infusion of garlic.
Watering Phalaenopsis after purchase
Flowering plants
During the flowering period, the orchid is watered several times a week. This allows you to create natural conditions for the flower and protect the air shoots from drying out.
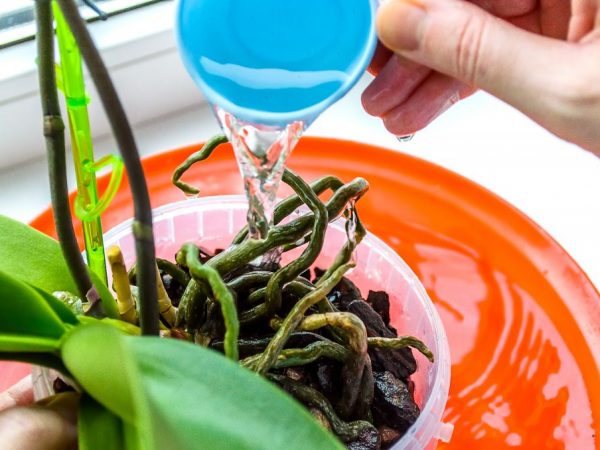
During flowering, the plant is irrigated in any of the following ways:
- daily under the root with clean water;
- multiple times during the day from a sprayer;
- constantly, immersing the pot in water (passively).
A flowering orchid is fertilized with water-soluble formulations for flowering epiphytes. The feeding schedule should follow the system described in the annotation to the product.
After pruning or transplanting
After pruning, the epiphyte needs water, therefore, as soon as possible after the manipulation, the phalaenopsis, transplanted to a new place, is also watered.
During the recovery period, a tropical flower needs feeding with succinic acid, good illumination and rest. The condition of the soil is especially closely monitored: it should be slightly wet, but not heavy, since the lack of proper ventilation threatens to damage the root system hidden under the turf.
Watering at different times of the year
In winter and late autumn, watering the phalaenopsis orchid is different from the irrigation process in the hot period. How often to water indoor phalaenopsis, he himself will tell. To do this, carefully monitor the condition of the seedling and the color of its leaves. If the crown has a natural shine and turgor, and the leaf rosettes are dense and without traces of drying out, watering the orchid is carried out efficiently.
The frequency of irrigation is also reduced due to:
- Artificial heating of premises, which does not warm up enough air in different parts of the room. Drying clothes and cooking with closed windows also contribute to the increase in humidity.
- Cooling down the soil in the pot. In winter, window sills warm up less, even when the batteries are hot and in close proximity to them. Cold glasses also reduce the moisture requirement of epiphytes.
In the summer, it is correct to water the phalaenopsis orchid from a watering can. The water temperature should be slightly higher than room temperature, and the drops should be small. After irrigation, excess water is collected in the leaf axils. In this case, paper towels or a foam sponge will come in handy.
Care errors and their consequences
Proper watering of any phalaenopsis orchid is the key to its health. For orchids, rooms with high humidity are the best choice, then you often won't have to water the phalaenopsis.
Irrigation violations lead to the following consequences:
- with excess water - to decay of leaves, roots and soil;
- with a lack of moisture - to drying out of leaf rosettes and flower shoots, underdevelopment of buds, thickening of the knees and strong growth of rhizomes;
- if the characteristics of water for irrigation do not match - to alkalization of the soil, sod compaction, and rapid decomposition of the substrate.
Conclusion
The natural environment of orchids is difficult to recreate in a room. A flower that has enough moisture has green tight leaves and a dense leaf rosette, quickly forms aerial roots and blooms for a long time. Withering and loss of buds indicate poor care.
Excess moisture, as well as its lack, cause irreparable harm to orchids. Excessive moisture causes root decay and the development of complex diseases that lead to the death of euphytes.