Growing peppers according to the advice of Galina Kizima
Pepper is one of the healthiest vegetables around. Galina Kizima made the cultivation of peppers easy and enjoyable. Thanks to her technique, you can get a good harvest without problems.

Growing peppers according to the advice of Galina Kizima
Growing seedlings in a greenhouse
As Kizima advises, it is necessary to start growing peppers with the selection of varieties, based on the region in which the sowing will be carried out.
In the northern regions, where there is little sun, early maturing undersized species are planted. After 70-80 days, the seedlings can be planted in the ground.
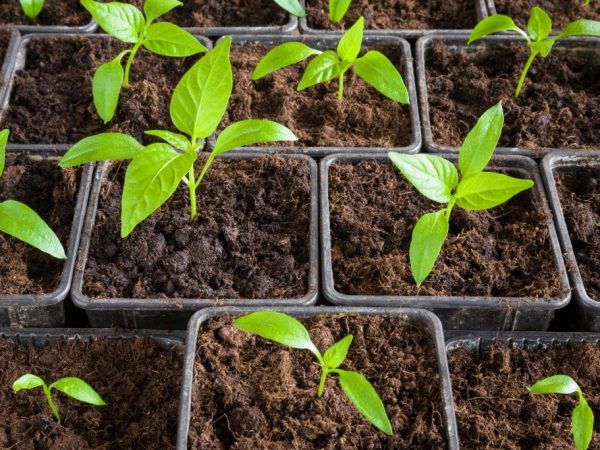
Tanks for sowing seedlings should not be higher than 13 cm. This is required by the depth of planting seeds.
Growing conditions
Galina Aleksandrovna has rich experience in vegetable growing and advises to pay attention to several subtleties when growing peppers. These include:
- sowing time;
- stimulation of seeds;
- sowing depth;
- landing scheme.
It is recommended to start sowing in the first decade of February for areas with a cold climate, and a month earlier for southern regions. If the spring is protracted, then pepper should not be planted in January. Lack of sunlight will affect the duration of the appearance of true leaves. Artificial lighting won't help. This can go on for up to a month. Long standing with cotyledon leaves has a bad effect on the further harvest.
The next tip from Kizima concerns seed stimulation. They swell hard and need this procedure. To do this, you need to take a thermos with water heated to 53 ° C and put seeds in it for 20 minutes. After taking it out of the thermos, wrap it in a damp cloth and put it in the freezer for 2-3 hours. After that, immediately sow.
Fill the pots with soil not completely, but only by 0.5 height, and tamp the pots a little with a spoon or hand. Kizima advises to lay out the seeds according to the 2 × 2 cm scheme. 5 cm of earth is poured on top. Sowing depth 3-4 cm. Peppers should not be planted deeply. There may be rotting of seeds. It is necessary to withstand the measure and not allow bushes to grow too close to the top of the pot.
After sowing, all pots are covered with something that can retain heat (glass, cloth or plastic wrap). Placed in a warm place. Seeds can be germinated in a separate room and then planted in containers. After germination, the covering material is removed.
Soil temperature when planting
To accelerate the seedling germination, the soil temperature is raised to 28 - 32 ° C. At 40 ° C and below 20 ° C, the seeds do not germinate. They rot in the ground. The lower the soil temperature, the longer the seeds sit in the ground. Germination rate by day depending on temperature:
- 28 - 32 ° С - 10 days;
- 25 - 27 ° С - 15 days;
- 20 - 22 ° C - 20 days.
Seedling care

Seedlings need good lighting
After germination, it is recommended to immediately place the seedlings under artificial lighting, to harden by lowering the temperature to 18 ° C for 4-5 days. Then increase to 22-25 ° C.
Avoid night and day temperature differences. This vegetable crop loves warmth and light.The development of the cotyledon leaves lays the program for further growth.
The introduction of nutrients begins immediately after the cotyledon leaves open. It is recommended to apply:
- a weak solution of liquid fertilizer containing potassium, nitrogen, phosphorus and trace elements;
- azophoska;
- mineral fertilizers.
Organics are not used immediately after germination. The foliage will grow faster than necessary. The root system will suffer.
Seedling containers
Galina Aleksandrovna advises taking flower pots for sowing, the most common plastic ones, with a volume of 1 liter. She does not recommend using peat.
They absorb moisture, taking it from the ground. Some people think that planting potted seedlings in the soil is better than replanting. But dense walls interfere with the development of roots and their germination into the ground. The plant is delayed in development.
Dive pepper
This process must be done with extreme care. It is important not to disturb the root system.
Abundant watering will help to avoid this problem. The soil becomes wet to slush. From such wet soil, the plant is pulled out without damage.
Holes must be made in transplant containers. This is for the waste of excess moisture and airing the roots. Drainage must be done on the sides as well.
Fill containers with soil and compact it, water and make a hole under the seedling. Lower it into the hole carefully, without bending or damaging the spine. It is strictly forbidden to shorten the central root. Do not deepen the plant below the previous planting level. Squeeze the soil around on all sides and pour a teaspoon of liquid with a nutrient solution
The older the pepper seedling, the easier it will tolerate the stress of transplanting. This should be done in the phase of 3-4 true leaves.
After germination, the sprouts do not need illumination, then it must be turned on until 8 o'clock. This is due to the fact that the pepper does not like long-term illumination.
For convenience, it is necessary to sow 3 seeds in 1 pot, at a distance of 1-2 cm from each other in a triangle. This will make it possible to do without an early transplant (picking) at all. When all seeds germinate, the strongest is selected and left. The rest are sheared with scissors. You cannot pull them out of the ground, the roots will be damaged.
This vegetable is characterized by a fibrous root system. Small pots will interfere with root development. Containers of at least 0.5 liters should be used for planting.
Planting in a greenhouse or open ground

Sprinkle seedlings with earth to the first leaf.
The process begins even with frost. But only in a greenhouse or greenhouse. It is possible to grow peppers alongside other vegetables. Tomatoes or cucumbers can help control aphids. This is convenient in small garden areas or home greenhouses.
But it's better to allocate a separate room. Insulate the soil. For biofuels, take hay, unripe compost or leaves. You cannot take manure, otherwise the pepper will build up the upper part and will not tie the buds. If the presence of nitrogen in the soil is higher than the norm, the ovary will be thrown off.
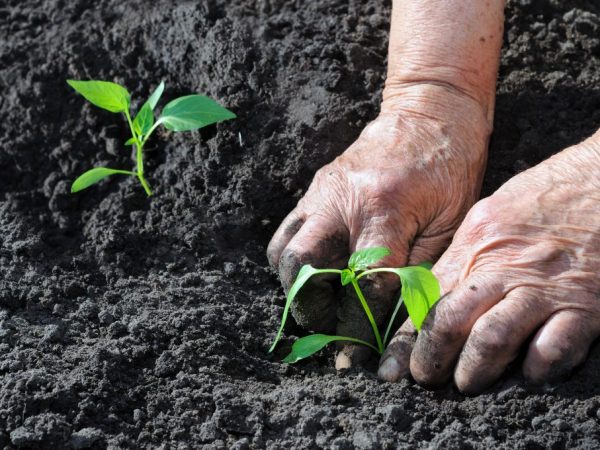
The layout of the landing pattern is done. Holes are dug according to this scheme. Seedlings are carefully removed from the pot.
We plant so as not to damage the roots. This lump of earth is inserted into the hole, sprinkled with earth to the first leaf. Intensive watering is in progress. Transplantation of seedlings has been completed.
Watering and fertilizing
Timely feeding and watering is the key to obtaining a high-quality harvest. Every 14 days after transplanting, watering is carried out, top dressing is done.
- It is better to do this with water mixed with fertilizers. The recipe can be as follows: dilute 2 tbsp in 10 liters of water. l. azofoski and 1 tbsp. l. chlorine-free potassium. Add 2 tsp here. microelements. Water at the rate of 10 liters of this solution per 5 m of the garden.
- It is necessary to constantly monitor the moisture in the soil. The mulching process is done along all planting rows.
- In the new place, the seedlings adapt 7-12 days from the moment of transplantation. If new leaves with a lighter color appeared, everything is in order, the seedlings have taken root.
During this period, fertilizing is done with mineral fertilizers. For this, the following composition of the solution is used: 0.5 tbsp. l. urea, 1 tbsp. l. double granular superphosphate, 1 tbsp. l. chlorine-free potash fertilizer. Diluted in 10 liters of water. Consumption will be 150-200 g for each bush.
Pepper shaping
This process depends on the previously selected seed for sowing. Undersized can not be tied up. Tall ones should be tied up and shaped.
- Before the fork, the stem is left without leaves. The third stem is removed from the fork. Internal branches with buds do not leave, avoiding thickening and shading. It is from the inner buds that the ugly fruits emerge.
- You can get seeds for the next plantings. For this, a fruit is left in the fork. His growth will be strong and powerful. An inhibitor, a special substance found there, will prevent the development of another ovary. The fruit will be large with excellent seeds.
- If you need a lot of small fruits, then the central one is removed as early as possible. You should normalize the yield on your site, depending on the condition of the plants.
- When technical ripeness is reached, varieties of Bulgarian selection are removed. The vegetable is already edible and can ripen to its biological ripeness when plucked. Dutch hybrids are tasteless at the stage of technical ripeness. It is better not to take them off earlier. They ripen poorly. Outwardly it is visible when it is better to rip. This is done when the first signs of varietal coloration appear.
On their own small household plots, as Kizima advises, you need to plant the usual Bulgarian varieties. They are unpretentious and reliable.
Typical growing problems
When planting and growing, a number of problems can arise:
- no buds for a long time
- no blooms and ovaries
- flowers fall
- stem rot
The reason for the long absence of buds and flowers may lie in a large amount of nitrogen fertilizers, poor pollination, high humidity or a strong cold snap. It is necessary to spray Bud or Ovary with solutions. This should be done before 12 noon. In hot weather, ventilate, and often do not water when it gets cold
Scattering of the ovary or flowers indicates that the seedlings are frozen, the soil is too dry on the site or an excess of nitrogen. This provokes fruit rot. Fertilizer Uniflor-Bud (2 teaspoons per 10 liters of water) will help to recover the harvest.
Stem rot causes plant decay. To avoid infection, it is necessary to thin out the thickened plantings, ventilate the room, and avoid low temperatures.
After the onset of symptoms, it is necessary to stop watering, increase ventilation, remove all infected leaves and twigs before the fork. Wipe off the plaque with a napkin. Cover the damaged area with a mixture of chalk and potassium permanganate with water. Treat with ash.
Stolbur disease is manifested by mosaic coloration and wilting. This disease is viral. You can only get rid of the destruction of the bush. It is recommended that the bush be dug up and burned.
Top rot is manifested by rotting at the top or side of the fruit. It is not a disease. The soil lacks potassium, calcium and water. You need to water and feed. The plant will recover.
Conclusion
You can avoid difficulties and mistakes in growing pepper if you organize this process correctly. Use the advice of Galina Kizima and the harvest will meet your expectations.


