Making tapestries for cucumbers with your own hands
Curly cucumber varieties cannot grow upward without some kind of support. But it is not always possible to buy a ready-made structure. A reliable do-it-yourself cucumber trellis will solve this problem. The stand is used for growing cucumbers in the open field and in the greenhouse. Supports are suitable for such varieties of cucumbers: Courage, Kedrik, German, Marinda, Chistye Prudy.

Making tapestries for cucumbers with your own hands
Benefits
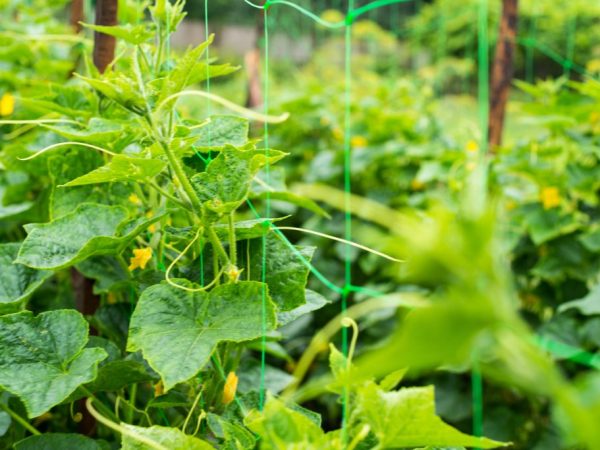
The most common cucumber trellis is a hand-made frame with stretched wire or mesh, but its use greatly facilitates and improves the cultivation of cucumbers. Plants twine around only it, and not neighboring crops or structures that are not adapted to this. The trellis method, in comparison with growing in spread, allows:
- significantly save space, especially in the greenhouse;
- lengthen fruiting;
- reduce fungal diseases;
- to increase the uniformity and yield of fruits.
The support makes it easier to apply fertilizers and fertilizers under the plants. Harvesting fruit is simplified. With an upright position, cucumbers are all in sight. You don't need to look for them in the foliage. It is easy to move between the posts, which saves time and does not injure the plants. The likelihood of being pricked with cucumber spines is minimal.
Wood trellis
The simplest design is a wooden support. The stability of the support depends on the soil on which it is installed and on the region. In humid areas on sand, the structure will stand up to 4 years, on clay - up to 10 years. And in arid climates it will last more than 10 years.
In addition to its intended use, it can also perform a decorative role. For example, it is decorated with a wooden arch outdoors.
The rack is erected both before and after planting cucumber seedlings. It can be made in 3 standard shapes: square, triangular, rectangular. The cells are made of wood or mesh. The trellis can look like a ladder.
Tools and materials
In order to make a reliable structure, it is better to choose hard types of wood, namely: oak, mulberry, ash, chestnut. Maple, birch and poplar are susceptible to rotting, so they will not last long.
Do not use wet wood for mounting the structure. It can start to rot.
To build a tapestry for cucumbers with your own hands, you will need tools:
- screwdriver or screwdriver;
- hammer;
- hacksaw;
- sanding paper;
- building level;
- moisture resistant glue;
- a brush for applying glue.
The material on which the cucumbers will directly curl can be varied: soft rope, twine, old sheet, soft-sheathed wire.
Manufacturing steps

Making tapestries is not difficult
- First, prepare the place. They dig out recesses 80 cm deep. This is enough for the support to hold tight and not fall under the weight of the lashes and the harvest.
- Then, at the corners of the future bed, you need to install support pillars. They are carefully buried and tamped with soil.The distance between the posts is 1-2m. The racks must be buried to a depth of at least 60 mm. They take on the main load, so their thickness should not be less than 50mm.
- Further, the supports are fixed. If the structure must be inclined, then the extreme anchor posts are buried at an angle of 70 ° to the soil. They are fixed with wire braces, which are tied to metal corners. The corners are drilled perpendicularly into the ground.
- Then you need to install a horizontal cross member to the edges of the vertical battens. It turns out the frame.
- Next, the crate is performed. The slats are screwed to the frame with self-tapping screws to obtain cells with a diameter of 10-15 cm. They can be square or diamond-shaped. Waterproof glue is applied to the joints.
- Rope is used instead of laths if it is necessary to make a mesh with cells. Nails are nailed to the slats at a distance of 40-60 cm, then they are folded. The result is staples, to which the ropes are tied and placed parallel to the ground. The ropes are tied to the support post.
- The threads are pulled vertically in the same way. They are tied to pegs that are previously driven into the ground.
Metal trellis
The metal construction is sturdy and reliable. More efforts are made to build it, but it is durable. If properly installed and maintained, it will last over 20 years. It must be installed before planting cucumber seedlings.
Tools and materials
Making a tapestry for cucumbers with your own hands requires the following tools and materials:
- reinforcement with a length of 180-200 cm;
- metal pegs;
- crossbeam pipe;
- steel wire 2 mm and 3.5 mm;
- garden hammer and drill;
- apparatus for electric welding.
Manufacturing steps
- First, holes are made in the soil with a garden auger with a depth of 30-45 cm. Chopped reinforcement rods are driven into each hole with a hammer. Wells are tamped with earth.
- A crossbar is placed horizontally on top, with which the pillars are connected by means of electric welding. This is a frame.
- Next, a steel wire is used. It is pulled from the crossbar to the pegs in the ground. They are driven in through 15-20 cm from both sides of the garden.
- To create a metal mesh, the wire is pulled between the supports every 50 cm.If the distance is made larger, the mesh will sag. The upper rows are made of wire with a thickness of at least 3.5 cm, because they will be the main burden.
- The metal support is heavy and one-piece construction. It is not moved around the site every season for crop rotation. Cucumbers alternate with other climbing plants such as peas or beans. And make another cucumber, for example, a wooden one.
Tire and wheel rim tapestry

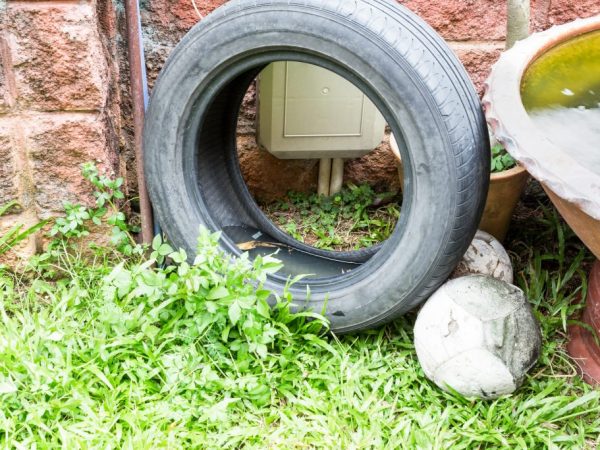
The tire will serve for the manufacture of the support
The support is erected before planting the cucumber seedlings. For this economical support, a tire from a truck, tractor or combine is used. A bike rim without spokes is suitable for the top bracing.
Tools and materials
Required for work:
- Bulgarian;
- 2 metal rods 1.5-2 m long;
- old burlap;
- agrofiber;
- metal post;
- wire.
Manufacturing steps
- The grinder is used to cut the tire lengthwise. One part is dug into the ground in the garden bed. In the center of the tire, rods in the form of a hut are inserted and the soil is laid.
- An old burlap is placed in the gap above the wheel, its edges are hidden under the tire. Holes are made in the burlap for seedlings.
- Agrofibre is pulled along the tire perimeter to protect the seedlings from temperature fluctuations. During watering and loosening, it is raised. They remove the shelter after the shoots grow up to 20 cm.
- The pillar is installed in the middle of the garden bed. A rim is attached to it from above through the holes for the spokes. The tire is wired to the rim. It turned out to be ribs.
Trellis processing
Before being placed in the ground, wooden poles are treated with an antiseptic and a primer, which prolongs their service life. Then they are covered with 1-2 layers of linseed oil, grease, resin or oil paint. These substances impart moisture resistance to the wood.Chestnut or white acacia items do not need to be processed. When using PVC material during the installation of the props, it does not need to be processed.
In order to protect the metal structure from rust damage, all elements are cleaned and coated with oil paint. Plastic nets are washed in soap and water. Dry in the open air.
Soft dressing material - ropes, cloth and tapes - is soaked in water with laundry soap. Then boil for 20 minutes in a new soapy solution.
Conclusion
Props for growing cucumbers with props have a number of undoubted advantages. You can make them yourself by choosing the most convenient method. At the same time, we must not forget about the preparation of materials and tools. The better the materials are selected, the more durable the structure will be.


