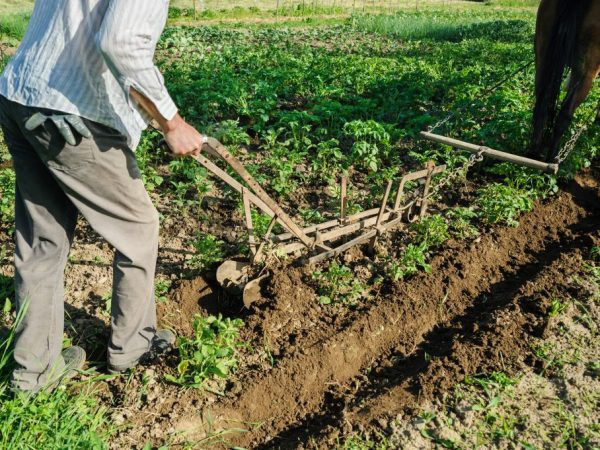
How to make a manual hiller
One of the most important processes in growing potatoes is hilling: loose soil allows it to grow quickly. The manual potato ridger makes it easier to care for your crop.

Making a manual hiller
Why spud potatoes
During the planting period, the gardener manually measures the beds, and after that he digs holes with a shovel, loosens the earth.
Potatoes need regular hilling: in loosened soil, the roots are saturated with oxygen, and the formation of tubers increases. By regularly hilling the garden, it will be possible to achieve a yield increase of up to 30%. At the same time, excess moisture leaves the soil, the tubers are warmed up, enriched with oxygen and grow.
To facilitate the process of loosening, a manual hiller is used, which can quickly process an area of up to 10 acres.
Hilling features:
- the site is loosened 2 times per season: when the potatoes rise to 10 cm from the ground and when it reaches a height of 20 cm;
- hilling is carried out on a cool day: early in the morning or late in the evening;
- after hilling, the plants are watered abundantly.
Usually they use hand tools: a hoe, a rake or a hoe, but they are long and hard to work with. To facilitate the process, use a homemade and convenient tiller.
Types of manual hillers
The hiller significantly facilitates soil cultivation and speeds up the process of harvesting. It is not difficult to make the simplest manual potato hiller with your own hands.
Types of hillers:
- hiller-plow;
- disc hiller.
The disc hiller is better because:
- 2 people work with the plow;
- disc hiller can handle 2 beds at once; when moving to the next furrow, part of the hiller remains on the previous one;
- it is convenient for them to loosen the ground between the beds.
Disc hiller

It is convenient to loosen the soil with a hiller
It is best to use the disc manual potato ridger before planting or when harvesting.
The hiller is placed on the walk-behind tractor and held in the air. With its help it is possible to regulate the depth and width of the arable land. Ideal ratio: depth 15 cm, width 20 cm.
The manual potato ridger is a frame on wheels with discs fixed to it.
They measure the rotation of the discs and the width between the beds. The angle of rotation must be the same on all sides, otherwise the tiller will lead. The width between the wheels is 10-14 cm, the diameter of the wheels is 70 cm.
Rules for making a manual hiller
How to make a manual potato ridger? First, create a drawing, and then proceed with the assembly.
The manual hiller consists of the following elements:
- bridge beam;
- rack - 2 pcs.;
- bracket for fasteners;
- cam mechanism;
- locking bolt;
- lever;
- T-shaped leash;
- disc plows - 2 pcs.;
- screw lanyards - 2 pcs. (for adjusting disc blades).
Do-it-yourself assembly of the hiller begins with the manufacture of discs (covers from enameled pots are suitable), after which fasteners to the discs are made. For convenience, it is better to make 2 bends.
Take disks or lids from pots with a diameter of 40-60 cm, screw tarleps - 2 pcs., A meter hollow water pipe with a diameter of 2.55 cm for a vertical rack and one more pipe for the handle, a T-shaped leash and a gas lamp or a pipe bender , grinder for grinding seams. They also take adapters for the disc connection and welding for fasteners and bolts.
If there is no tarlep at hand, it is replaced with a simple steel plate with holes for stepped tilt adjustment. If there is no pipe bender, use a simple gas burner, it heats the metal at the bends.
Assembling a manual hiller
The first step is adjustment. To make a homemade, convenient and multifunctional unit, you need to adjust the height using a telescopic apparatus. It is located in the central part of the structure.
Pipes of different diameters are inserted into each other, and it goes into the rear thrust. Further, the hiller is adjusted to suit your growth. Angle control is provided by tilting the rack in the middle, changing the angle between the vertical bed and the front link.
The bed is set in motion, the front link is attached to the central rack with a hinge, and it is adjusted with a tarp. Discs and rear pillars are fastened with a welding machine.
Next, looking at the drawings, the front link is attached. To do this, take a hinge mechanism and a long bolt, connect and get a U-shaped rear rod up to 50 cm wide.
The handle is made 20 cm, in the middle of the fork, a vertical pipe is welded, and the end of the tube is used to fix the entire structure into a vertical rod. In the upper part of the rack, openings are made for adjusting the height, the same openings are drilled in the vertical fork. The discs are protected when covers are used. They are bent so that one side is convex and the other concave.
The self-made potato hiller is ready for use.
Conclusion
It is more profitable to spend a lot of time creating a manual hiller than buying an industrial one or working as a hoe.


