How to prepare potatoes before planting
Preparing potatoes for planting is a responsible event, on which the yield of the crop largely depends. Gardeners are accustomed to carefully preparing vegetable seeds for planting, but they often forget about the pre-sowing preparation of tubers. Simple procedures contribute to timely and friendly shoots, will be a good prevention of various painful conditions and protect against pests.

Preparing potatoes before planting
Soil preparation
All experienced gardeners are engaged in soil preparation before planting potatoes. Presowing work is carried out in the fall and begins with the selection of a site. It should be sunny, protected from drafts.
Further, the following activities are carried out:
- The soil is dug to the depth of the fertile layer, the podzol is not affected.
- For each m², up to 8 kg of organic matter, up to 45 g of superphosphate and up to
20 g of potassium sulfate. These fertilizers are well absorbed by the soil and practically are not washed out of it.
In the spring, the site is loosened with harrows or rakes. When the soil is dry enough, it should be dug up or plowed, but not as deep as in the fall. At the same time, 20 g of ammonium nitrate is applied to 1 m² of the garden.
The author Kharevich Yuri Antonovich in his writings says that it is possible to prepare the soil for planting crops in the spring, but then the yield from each hundred square meters will be 20-35 kg less.
If the winter was little snow and the soil did not settle down, then there is no need to dig up the plot in the spring. It will be enough to fence the soil and apply mineral fertilizers. Seeds are planted when the soil warms up to 7-9 ° C.
Preparation of sandy areas
Sandy loam and sandy areas are dug up in the spring with the simultaneous application of such fertilizers per 1 m²:
- up to 10 kg of humus;
- about 30 g of ammonium nitrate;
- 40-45 g of superphosphate granules;
- 20-25 g of potassium sulfate.
Author Alexander Ustyuzhanin recommends that the area suffering from excess moisture be drained using deep canals along its perimeter. If the groundwater is too close, canals are arranged in the middle of the site.
Cultivation of peat areas
Peat-boggy soils should be cultivated: groundwater should be diverted using drainage or drainage ditches into a settling tank. After that, peat must be sanding: for each m², add 10 kg of sand, mineral fertilizers (20 g of ammonium nitrate, 40 g of superphosphate and up to 30 g of potassium sulfate) and a bucket of humus.
Gardeners recommend abandoning the cultivation of crops on peat-bog soils. Potatoes grown on peat have the worst taste and contain little starch.
Selection and preparation of seed material
The preparation of selected potatoes for planting should be taken seriously. The future harvest largely depends on this.
The preparation of potato tubers for planting begins with the selection of high-quality planting material.Experienced gardeners buy new varieties or choose pure-variety seeds from available ones. The mass of potatoes should be from 50 to 100 g, then the seedlings will be friendly and healthy. You can take tubers and smaller, but then they are put in the hole in two.
Greening tubers
Preparing potatoes for planting begins in the fall. At this time, immediately after harvesting, the tubers are greened. The planting material is scattered in several layers in a well-lit room, but protected from direct sunlight. After 10-14 days, solanine is formed in the tubers - a green substance that protects against diseases, rodents and pests and increases the keeping quality of potatoes. If for some reason it was not possible to do this in the fall, it is strongly recommended to start with this event in the spring.
Sorting of planting material

Only healthy tubers are suitable for planting.
Preparing potato seeds for planting includes sorting them. Rotten and diseased tubers are discarded, only high-quality ones are left for storage.
For this purpose, all seeds are placed in a urea solution (1.5 kg of fertilizer per bucket of water). Healthy tubers immediately sink to the bottom of the solution, and sick and unripe tubers will float.
After that, healthy planting material is dried and sorted into three groups:
- large (80-100 g);
- medium (from 50 to 80 g);
- small (from 25-50 g).
Sorted potatoes are planted in separate beds. Seeds of the same size will produce the same shoots and will be easier to care for. They can be harrowed at the same time, and after the formation of rows and spud.
Disinfection with fungicides
Preparing potatoes for planting in spring also includes disinfecting seed material with fungicides. Pathogens of various disease states can live on the potato peel: phomosis, nematodes, late blight, etc. Therefore, potatoes are treated with bio-fungicides. Methods for disinfection of planting material:
- 7 days before planting seeds in open ground, "Planriz" is used.
- On the day of planting, it is best to use Fitosporin or Baxis.
- Seeds should be sprayed with Agat-25K or Binoram preparations twice (a few days before planting and on the day of planting).
- The drug "Albit" is used 24 hours before planting the tubers.
Instead of bio-fungicides for the preventive treatment of planting material, some gardeners use the following solution: 1 tsp. copper sulfate is diluted in 3 liters of water. The seeds are immersed in such a solution and then dried.
Heating and drying
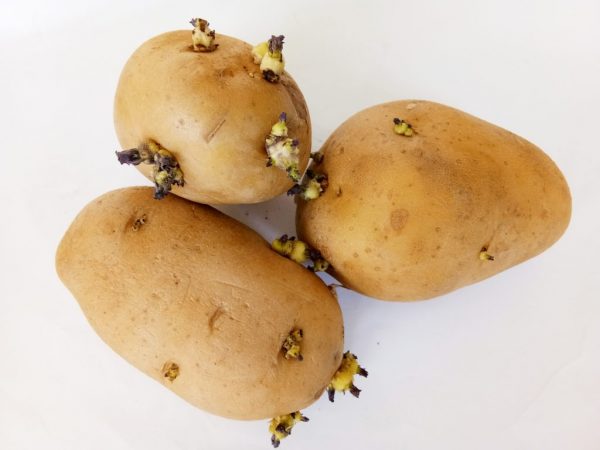
Two weeks before planting, the tubers are taken out of the place where they were stored in winter into a warm room with an air temperature of 18 to 20 ° C. They will be able to warm up well here and will stick a little. This will help protect the seeds from damage during planting, and also stimulate the formation of sprouts.
Sprouting potatoes before planting

Tubers need to germinate
The preparation of young potato seeds before planting by the germination method, according to the research of specialists, helps to increase the yield of any variety.
Germination is especially important for gardeners whose soil is heavy loamy, peaty or floodplain. For the formation of shoots, the planting material is placed in a warm room with high humidity a month before planting. The best place would be a greenhouse. The potatoes are lined in one ball, carefully turned over every 5 days so as not to damage the sprouts. The temperature in the greenhouse during the day should be 6-12 ° C higher than at night.
It is best to keep the seeds at a temperature of about 20 ° C for the first 7 days, and lower the temperature to 7-8 ° C for the next 3 weeks. Such a change in temperature stimulates the formation of sprouts, but also prevents them from overgrowing.
Humidity
A prerequisite for germination is high air humidity - at least 80%. In a greenhouse, there will be no problems with this condition. If potatoes are not germinated in greenhouse conditions, they are sprayed with water every day.
The germination of seed material can be accelerated by spraying it alternately with the following solutions:
- 1 tsp nitrophosphate is diluted in 3 liters of water.
- 1 tbsp. l. preparation "Effekton" for 3 liters of water.
- 1 tsp urea is dissolved in 3 liters of liquid.
- A solution of a growth stimulator "Potassium humate" or "Sodium humate" is used for spraying 4, 5 and 6.
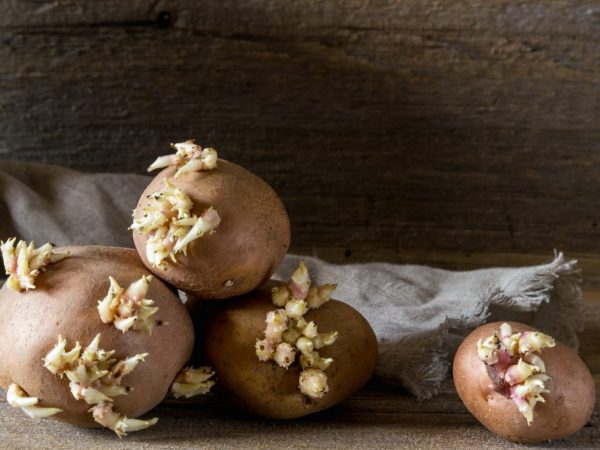
Tubers are considered ready for planting if the sprouts reach 1 cm. Sprouted planting material sprouts 10-14 days earlier than usual and takes root faster.
Vernalization of tubers
Preparing potatoes for planting using the vernalization method includes selecting high-quality seeds and heating them at a high temperature (23-25 ° C) for several days. The tubers are spread in a thin ball near the light source (windows, transoms), so that the illumination is uniform.
Gardeners distinguish two ways of vernalization:
- The dry method of vernalization is correctly used by experienced gardeners. To do this, it is necessary to bring the planting material into a room with an air temperature of about 15 ° C and keep it there for a month with sufficient illumination. The seeds are turned over every 6 days so that all the shoots can see the sunlight. After 30-35 days, the potatoes will be ready for planting, they can be collected in boxes. Large seeds are cut in half lengthwise so that each part has at least 2-4 healthy sprouts and placed on the bottom of the box. Some gardeners recommend cutting the tubers in the fall when preparing them for storage, in October or November. After that, keep them at a temperature of 14 - 20 ° C and high humidity for two weeks. Under such conditions, a cork layer forms on the cut, which protects against moisture loss and the introduction of microorganisms. Sometimes, instead of cutting, the tubers are cut, leaving a small bridge, which is broken when planting.
- With the wet method, the potatoes are placed in a wooden or plastic container in several rows with their eyes upward. The bottom of the box and the layers are sprinkled with wet peat or sawdust, and after 2-3 weeks the tubers sprout not only sprouts, but also roots. The wet method of vernalization is used by those who will plant seed by hand: the mechanized method will damage the formed roots.
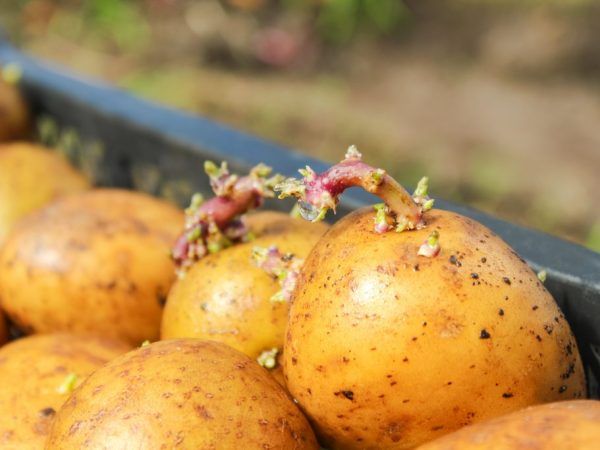
Only with good light on the tubers, thick and strong dark green shoots with a purple tint are formed. If there is not enough light, the shoots will be thin, weak and pale. They will break and be damaged when planted, and they will not grow into a healthy plant.
Ash treatment
Ash treatment is another way to prepare tubers before planting. Ash contributes to the accumulation of starch in potatoes, so many gardeners and summer residents fertilize the plot with it. Some of them moisten the seeds and pump them in this fertilizer. With this method, you can get good shoots and increase the yield.
It is impossible and not necessary to use all the listed methods of preparing potato seeds for planting, in most cases several of them are enough. Pre-planting work must correspond to the specific conditions of the individual site. How to prepare potatoes for planting, the gardener must decide and try for himself. Only then will the homestead please the owner with a good harvest of potatoes.


