We create a potato digger for a walk-behind tractor with our own hands


Using specialized techniques when digging up potatoes helps to speed up the harvest. In addition, manual labor takes up a lot of strength and energy. In general, the design is simple, so a do-it-yourself potato digger for a walk-behind tractor is a very real thing. Consider how to make a potato digger at home.
We create a potato digger for a walk-behind tractor with our own hands
Choice of design
Before you make a potato digger with your own hands, you need to study the mechanism of its action and decide on the type of equipment. Currently, there are potato diggers for a walk-behind tractor of the following types:
- lancet;
- roaring (vibration);
- conveyor (belt).
The types of equipment are similar in principle of operation. The simplest are lancet (fan) devices. They cut off the top layer of soil, in which the ripe tubers are located, and make it loose. You need to harvest with your own hands, which requires a lot of effort. The process is half automated.
When working with a vibrating machine, the soil, along with the ripened tubers, falls on the net. During strong vibrations, the dry soil crumbles, leaving only potatoes on the net.
Transport or belt installations better clean potatoes from the ground. They even clean up wet soil.
Drawing creation
After determining the type of device, a drawing and a diagram of a homemade potato digger for a walk-behind tractor are created. The diagram shows the type of construction. When creating a drawing of a homemade potato digger for a walk-behind tractor, the dimensions of the structure are displayed, observing the proportional relationship between the individual parts.
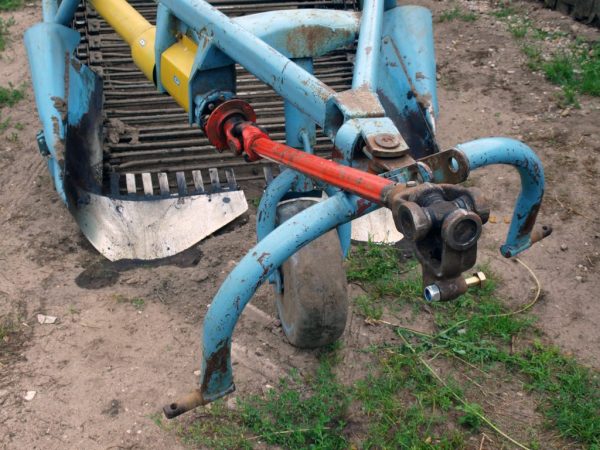
Consider how to make a roaring potato digger with your own hands. Its design includes a frame, a ploughshare that digs into the soil, a conveyor in which tubers are separated from the soil, wheels, elements that allow you to adjust the depth of digging the soil. All these elements are reflected in the diagram, think over the mechanism for regulating the depth of immersion of the knife into the soil.
It is advisable to show the finished sketches to a specialist, who at this stage will make adjustments to the drawing. If the drawing of a vibration-type potato digger is ready, they begin to manufacture the device.
Required tools and materials
Before you make your own potato digger, you need to prepare the tools. You will need a welding machine, an angle grinder and a drill. It is advisable to have on hand a set of wrenches and screwdrivers that may come in handy.
As for materials, you will need:
- channel made of steel;
- metal corners;
- 8-10 rods made of steel;
- sheet metal with a thickness of at least 3 mm;
- square metal pipe, 4 x 4 cm;
- nuts, bolts.
The dimensions of the corners depend on the dimensions of the homemade potato digger. A large structure should not be made for a personal plot. It is much more convenient to work with small-sized equipment.It is enough to take the corners, the dimensions of which are 63 mm and 40 mm.
The coulter is made of high quality metal. The thickness of the metal used must not be less than 5 mm.
Making a potato digger
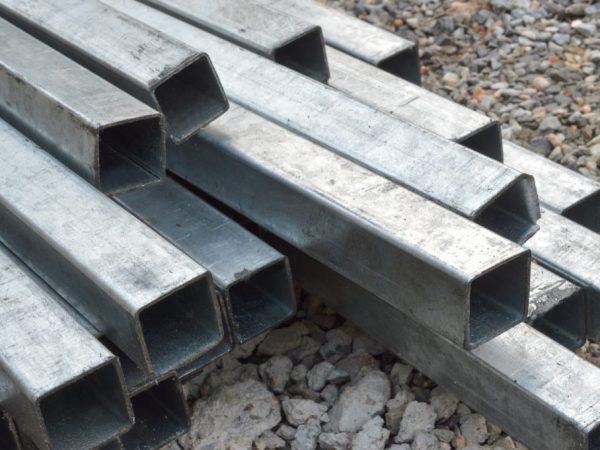
Pipes will be needed to make the frame
Let's consider in stages how a potato digger for a walk-behind tractor is made with our own hands.
- First, we make the frame. Using special equipment, we cut a metal square pipe into 4 pieces. Two of them should be 120 cm long, the length of the other two pieces should be 80 cm. Weld a rectangle from the cut parts of the pipe. You can do without a welding machine by fixing parts of the rectangle to each other with fasteners using corners, but welding is much more reliable.
- At the next stage, we make a share. Its width is 3-4 cm less than the width of the frame. This element serves to dig up the soil with the tubers of a ripe vegetable. Cut out the cutting part in the shape of a crescent. We weld a strip of metal of the same shape to the cutting part, which extends 1-2 cm beyond the edge. We sharpen the cutting part with any available tool. The sides of the share are at a 90 ° angle to the cutting edge. We bend them and weld the places of the folds to give strength.
- We make a conveyor. This is the compartment into which tubers with soil will fall. We weld steel rods to a metal strip. Subsequently, the vibration will sift the soil through the gaps between the rods, and the crop will remain on them. We bend the back of the rods so that the crop lingers in the conveyor and does not fall on the ground. The width between the rods should correspond to the dimensions of the potatoes. Since the size of this vegetable depends on its variety, it is impossible to say exactly at what distance the rods should be welded. Bend the edges of the metal strip. For the strength of the place of bends, we pass by welding. We also weld rods to the curved parts. These will be the sidewalls of the conveyor. Their width is 25-20 cm.
- We install wheels on square pipes. The height of the unit depends on the height of the walk-behind tractor or cultivator for which the equipment is manufactured.
- At the end of the frame, we make a part from a channel bar that allows you to attach attachments to the walk-behind tractor.
- At a distance of 30 cm from the beginning of the frame, we weld a steel round pipe. From the outside, using bolts and nuts, we fasten metal strips. We make holes for the bolts and nuts with a drill. The second part of the strips is attached to the conveyor. This part of the structure is movable.
- Weld steel strips to the front of the frame at an angle of 45 °. At a distance of 10 cm from the beginning of the frame, weld a second pair of steel strips at the same angle, but in the opposite direction. Triangles are obtained. Using bolts and nuts, we attach the plowshares to the top of these triangles. We make holes for the bolts in the middle of the side of the share.
- In order to be able to adjust the angle of inclination of the share, we make holes at the top points of the side walls of this element and metal strips attached to a steel round pipe in the middle of the frame. We connect these holes with a metal strip. We make several holes in the metal strips. Depending on which part of these strips to attach the metal strips to, the tilt angle of the share will change.
- We weld the racks with wheels to the already assembled part of the structure. It is advisable to install wheels that are a miniature copy of the tractor.
All strips are made from sheet metal 3-4 mm thick.
A do-it-yourself potato digger for a cultivator or walk-behind tractor is ready.
Before using a do-it-yourself roaring-type potato digger, paint all its elements. This not only improves the appearance of the attachment, but also extends its operational life. With this technique, digging potatoes becomes a pleasant experience.
Some summer residents are trying to improve attachments, making adjustments. The result of such adjustments is drum-type equipment. Its difference from a vibratory digger is that the conveyor has the form of a cylinder made of small rods. This cylinder rotates during the movement of the walk-behind tractor, as a result of which the soil spills out through the holes between the rods. Such a design will additionally have to be equipped with a mechanism that drives a cylindrical conveyor (a hydraulic motor, for example).
An eccentric and a bevel gearbox act as an alternative to the hydraulic motor. Such a digger in use has no advantages over a screening one. It will take more time and resources to make it. Some even build mini-harvesters (Boar, for example), but they, like drum ones, are no more effective than a vibratory digger.
Compatibility with walk-behind tractors
We figured out how to make a vibrating potato digger ourselves, but it is important that it be compatible with the equipment available on the farm. It is better that the distance between the wheels of the walk-behind tractor and the distance between the wheels of the hand-made potato digger coincide.
Attachment weight is another factor to consider.
A homemade potato digger for a walk-behind tractor should not be heavier than the main equipment, otherwise the walk-behind tractor will wear out much earlier. The potato digger, designed to process several rows at the same time, usually has a lot of weight. It is made according to the same scheme, but 2 plowshares and 2 conveyors are attached to the frame. The resulting two-row digger is used to process large enough areas.
For personal plots, single-row devices are sufficient. If a homemade potato digger for a walk-behind tractor weighs more than 40-50 kg, it makes sense to use a motor-cultivator or mini-tractor (Drovokol t25, for example).
If a walk-behind tractor is purchased before the manufacture of attachments, the choice should be stopped on the model range of motor-blocks Ugra, Zubr (Z-16), Bulat, Belarus, Salyut, MTZ (05), Centaur (MB 40-1, MB 40-2), Neva. The model range of the Mototekhnika Neva brand is especially popular. Good for giving models MB2, MB23, MB-2S-7.0, MB2B-6.0FS. This is confirmed by the reviews of Yuri Leskov, who has his own blog on the relevant topic. Yuri studies various agricultural machinery in detail, paying a lot of attention to the models of the Neva brand.