Potato tiller

In China, rice is used instead of bread. In our latitudes, potatoes are more suitable for cultivation. It is he who is the second most important in the diet of a Russian after bread. An important role in the cultivation of this vegetable is played by the correct and timely care of potatoes, which is easy to do if a vegetable garden is planted for one family. If the owner is planting potatoes for sale, then one cannot do without technical means. A homemade potato hiller is suitable for leaving.

Potato tiller
This product is universal and available to absolutely all segments of the population. Therefore, it is especially important to plant high-yielding and long-term storage varieties. If you plow the land correctly with a standard distance between the grooves, then this design can be used when planting and weeding a vegetable garden.
Types of hillers
To build a potato hiller, you can take improvised materials, old spare parts from agricultural machinery that have become obsolete. A welding machine and a drill will also come in handy if the main work is done in advance.
Hillers are distinguished by the type of moving mechanism and the used traction force.
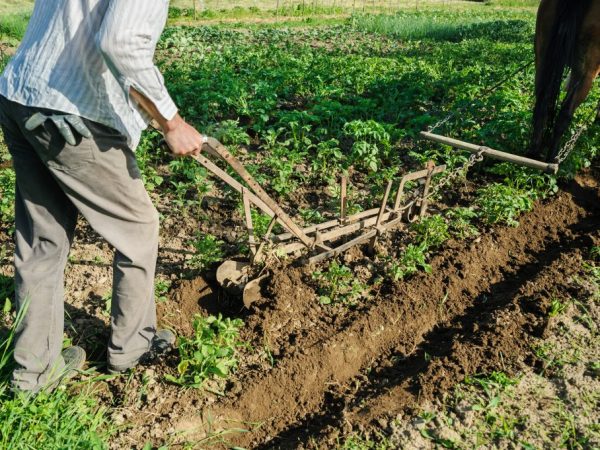
Manual
Such a tiller is suitable for a young farmer with excellent physical fitness.
To make a hand plow, you will need a few parts that can be found in your garage, pantry, and yard.
The price of such a design in the store is not high, but it happens that these small funds have something to spend. Sometimes the outlet starts this type of product extremely rarely and there is not enough for all the farmers in the region. In these conditions, it is easier to make a tiller with your own hands.
1. Disk
To build a rotary unit, you will need:
- Pens.
- Plumb lines.
- Discs that are the same size.
- Mountings.
- Two metal stands with which you can adjust the distance between the discs.
Useful Tips
- It is better to use a gas burner to heat the metal parts on the folds.
- For cutting you need a grinder with a special disc.
- To fasten the parts together, you need a welding machine.
- It is better to perform actions according to the drawing.
- Instead of discs, you can use strong lids of pots or pans of the same diameter, or spare parts from a rotary mower.
- Instead of front and rear plumb lines, pipes larger in diameter than those on which the base of the unit will be mounted are suitable.
- By connecting these pipes and fastening with bolts, it will be possible to adjust the hiller to the height of a person.
- Plumb lines are needed in front and behind to use the device together, otherwise the desired effect will not work.
- The handles should be comfortable, you can borrow them from an old bicycle or just wrap them with soft material.
- When all the necessary parts and fasteners have been assembled, it is necessary to proceed with the implementation of the plan and turn on the welding machine.
- It is better to process the seams with a grinder.
It is better to use such designs together.One at the front pulls the plow behind it and guides the movement, the other pushes at the rear, providing deeper penetration into the soil. If you deviate from the dimensions indicated in the drawing, the plow can quickly break from excessive stress on the parts.
2. Plow
To build a manual tiller of this type, you need:
- If the design is not very massive, then a regular wheel from a wheelbarrow or a small bicycle will do. Otherwise, it is better to use an all-metal structure.
- A small sheet of iron, 2-3 cm thick. From which you will need to equip a triangular blade to loosen the soil. You can borrow the finished paw from an old broken tractor cultivator.
- Tubes to create front and rear rods and a strut that will be perpendicular.
- Lanyard or other homemade connection device.
- Bulgarian and welding.
Recommendations for the creation of a manual unregulated hiller in the form of a plow.
The hiller can be built independently
The plow can be handled alone.
- Unsolder the front wheel together with the fork from the old children's bike.
- Divide a pipe of similar diameter into three parts and cut off one part.
- Weld a smaller piece of pipe to the bicycle fork.
- To the other end, fix a ready-made blade from a plow, made independently or borrowed from a tractor plow.
- The height of the handle should be adjusted in advance to suit your own height.
Instead of a handle, you can weld a pipe perpendicularly or use a handlebar from the same bike, having previously tilted it at the desired angle.
To the tractor
If the farm has agricultural machinery in the form of an old T-25, then it would be more logical to use a plow, which should be attached to a tractor like a cultivator. It is possible to huddle with the help of Mtz-80, but you need to do it at low speeds. Moving too fast and sinking the cutting edge of the plow too deep can ruin an entire field of potatoes.
In this case, you need to make sure that the device is heavy enough. Lightweight construction will not penetrate the ground to the required depth. It is better to make a hiller on a tractor with four rows. This device can be called a miracle, since with the help of such devices, the previously so laborious process of processing, planting potatoes with a hiller, digging vegetables can be performed automatically.
Guide to making a four-row hiller for a tractor:
- In accordance with measurements and using a torch, welding and grinder, make four legs.
- In the form of a rectangle made of a small diameter of strong heavy pipes, weld the frame, with two pipes welded parallel to the sides of the frame at the same distance from each other. At these places the ready-made legs will be attached.
- The distance should be measured along the rows of potatoes and the width of the tractor wheels. A mistake of five centimeters will cost the crop.
- When the frame and blades are ready, they should be fastened with a welding machine and bolts, depending on the design.
- It is better to attach the frame to the tractor in the form of a triangular base like a conventional trailer.
- An indispensable part of a good hiller is a canopy, which should be fixed on top of the frame at the same distance from the sides.
A wonderful shed is the upper part of the broken washing machine - an automatic machine.
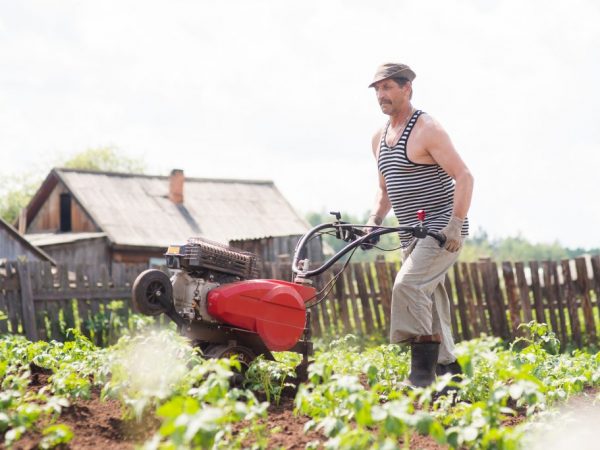
On a walk-behind tractor
For processing large areas of non-industrial scale, a mini-tractor is suitable - a walk-behind tractor, which moves with the help of its own motor and the efforts of a farmer at the same time. How small the effort will be depends on the power of the unit.
In order to make a hiller for a walk-behind tractor with your own hands, you will need several elements similar to the parts suitable for creating a manual-type hiller.This type of potato care device can be made two-row, if the walk-behind tractor can withstand a similar load of weight and resistance.
Tips for creating
- It is better to take a plow blade already ready, and not do it yourself. This solution will save time and effort.
- The attachment to the walk-behind tractor must be very strong and withstand heavy loads.
- To adjust the depth of entry of the blade into the ground, you need an iron rail about a centimeter thick, from the height of the mount on the walk-behind tractor and to the optimal penetration depth, at least 2 cm wide.
- Holes must be made in the rail like on a belt so that they are easily fixed with a bolt in the mount of the walk-behind tractor.
- One end of the metal belt must be welded to the blade, and the other must be fixed with several bolts attached to the walk-behind tractor.
Make adjustments depending on the type of soil and your own desire.
Why do you need a hiller
Hilling increases the yield of potatoes
Hilling potatoes is a very important procedure for the growth of vegetables. Those who neglect this process get low and small yields. Technically hilling helps to get rid of most of the weeds in the aisle. The grass between the holes can be pulled manually. It does not take a lot of time. Weeds remaining from technical processing between the rows of potatoes can be easily removed using a conventional hoe.
The advantages of processing potatoes by a technical method, using a manual, tractor plow or a tiller for a walk-behind tractor:
- The average yield can increase up to 30%.
- With the timely loosening of the soil, it is actively saturated with oxygen. This allows the tubers to take in more useful things from the ground.
- With the right air supply, potatoes grow faster.
Are there any disadvantages to hilling with additional technique?
If vegetables are planted in crooked rows, then during technical processing, mechanical damage to already grown tubers is possible, provoking rotting and a decrease in the quality and quantity of potatoes in a particular hole.
Useful Tips
Rules that must be followed when hilling:
- The weather should be overcast for optimal effect.
- It is forbidden to loosen the soil when the potatoes are not yet ripe or, conversely, have grown so much that the stems lie in the aisle.
- When using a two-row home-made cultivator, the dimensions of the furrows made during planting must be taken into account.
- You can't! Huddle if it's hot outside. There is a high risk that the plant will dry out and not give a normal harvest.
Conclusion
Growing potatoes on a farm for a large family or for sale does not necessarily involve a hell of a job. With the help of modern agricultural machinery and improvised means, you can build a potato hiller yourself. A competent approach and correct allocation of time will help the farm to develop in a short period.