Making a disc hiller with your own hands


The OKA walk-behind tractor is an irreplaceable thing when performing agricultural work. With its help, you can cut furrows for planting potatoes and huddle plants. The efficiency of the work will depend entirely on the attachments. An excellent analogue of purchased inventory will be a do-it-yourself disk hiller.
Making a disc hiller with your own hands
The advantages of a self-made design
Stores can provide a wide range of any tools for cultivating the soil for planting potatoes and other crops, but the product does not always meet expectations. Many manufacturers, in order to reduce the price and attract a buyer, use low-quality metal for the manufacture of a hiller.
The advantages of a self-assembled model:
- The ability to pick up a durable material.
- The simplest factory-assembled model has a fixed working width, the sliding one is more versatile in this regard, but it also cannot always satisfy the user's needs. Making a device with his own hands, the owner has the opportunity to choose the optimal working width on his own.
- Repairing a self-assembled hiller is always feasible and cheaper, at a time when factory models often need hard-to-reach parts. Repairing a purchased hiller is not advisable, so you have to buy a new unit.
Disc hiller
Compared to the Lister version, this model is more successful. It is believed that it is suitable only for processing potato beds, but it can be useful for hilling any plantings. Using a disc walk-behind tractor is much easier. The discs reduce the load on the mechanism itself, which prolongs the life of the device.
When creating a manual tiller with your own hands, it is possible to adjust the structure so that during processing the working elements move apart to the required width. Equal angles of inclination of the discs provide sufficient balance. In appearance, it resembles a frame fixed on wheels with suspended discs. While moving around the site, the discs grab the soil and pour it onto the place where the beds of potatoes or other crops are located. The hiller perfectly crushes and loosens the soil, so it can be used all year round.
According to the principle of work of the hiller, the models are divided into:
- single-row - unregulated structures that perform one operation, consist of 1 plate;
- double-row - processing of a row can be carried out simultaneously from both sides, the device allows you to choose the optimal angle and width of the furrows by adjusting the movable plates.
Diy disk hillers
For the manufacture of any design, a drawing is required. You can also build it yourself, based on your preferences and purposes of using the unit.The design of the model can have various forms of disc bend. For planting and harvesting, it is advisable to apply a powerful tip to the surface that will sink into the ground.
When creating a closed drawing, you need to take into account the bend or slope, as well as the presence of an adjustable / non-adjustable profile, dimensions. Extendable fenders and adjustable working elements will greatly simplify soil cultivation and make the device multifunctional. A competently drawn up drawing will help to correctly calculate the materials that will be required for the manufacture of the structure. The dimensions of the disk device are adjusted in accordance with the dimensions of the OKA walk-behind tractor.
Materials and tools
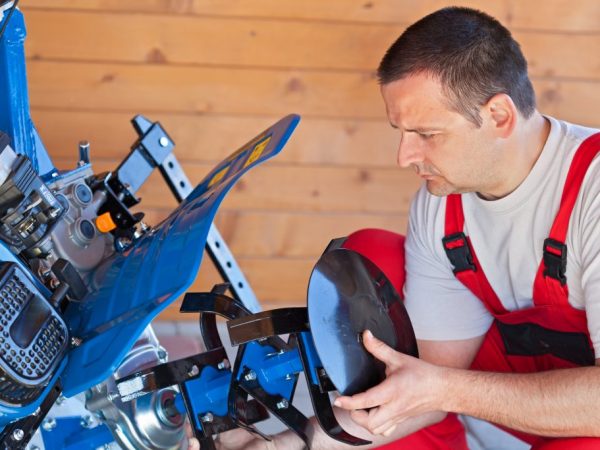
To make a hiller, you need a metella leaf
When starting to make a hiller, it is necessary to prepare the necessary materials.
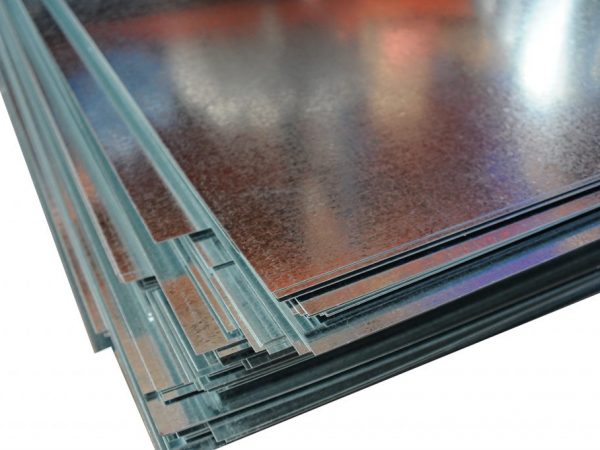
- A metal sheet. The thicker the steel, the longer the device will last. Profile pipes of different widths for the construction of racks and frames.
- Plain bearings to increase the reliability of the device, bolts, washers for connecting moving parts.
- Disks. If not, you can use old metal saw blades. These attachments always use high-quality steel, and the notches on the edges will provide additional loosening of the soil.
- Retaining parts.
- Lanyards - devices for exercising control over the turning mechanism.
- Leash.
In addition to materials, you need a tool. Please note that in order to make a hiller, you need to master the skills of working with welding. The following inventory is useful in work: a hammer, a welding machine, keys, electrodes and a grinder. Do not forget about protective glass or glasses, as well as gloves when working with a welding machine and grinder.
Features of making discs
Steel discs are constructed from steel with a width of 3 mm or more. Do not forget that the working blades must be made of the same metal. The lower edges of the discs must be bent. The main condition is the symmetrical arrangement of the working elements, otherwise the unit will lose stability, which will complicate the work.
Instead of steel, you can use plowshares from an old seeder. Discs are mounted at an angle. The distance between the lower points of the working elements of the disc hiller is equal to the width of the wheel track. It is recommended to connect the discs to each other using an adjustable adapter.
Construction process
Making a tiller with your own hands is not quite easy. Use the advice of experienced wizards and follow the execution algorithm. There is no need for haste in this matter.
Draw a drawing of a disc hiller, taking into account all the above tips. After that, make a test model out of a thick sheet of paper. Then, using the drawing, beginners are advised to make a small model out of a thin sheet of steel and only then proceed with the construction of real equipment.
First cut out all the pieces of equipment. Bend the disc holders at an angle parallel to the radius. Then you can start welding the elements together. All seams must be processed with a grinder in order to get rid of roughness that can cause a malfunction later.
Check the tightness. Start test welding. Then place an emery disc on the grinder and clean the edges. Next, proceed to fastening the stand, leash and lanyards. The elements are connected in the shape of the letter T. Fasten the seams with welding.
Connect the disks with adapters. Adjust their position. Attach the assembled structure to the brackets of the OKA walk-behind tractor through a leash, using bolts and locking parts for fastening. The stopper is inserted inside the profile pipe and pressed tightly against the outer surface. The discs must be perfectly flat for the device to be used for its intended purpose.
Equipment setup
Before planting potatoes or hilling them, it is necessary to carry out trial work in order to eliminate the shortcomings, if necessary. After fixing the disc hiller on the OKA walk-behind tractor, you need to check the tightness of the connection by inspecting every detail. Next, select the site where the trial work will be carried out.
Make any necessary adjustments to the hitch in advance. When the unit is operating, you should listen to the sound emitted by the equipment. There should be no creaking or other suspicious sounds.
Check the stroke profile, the quality of the grip and the distance between the working elements immersed in the ground. Set the angles of attack on the discs. It is important to take into account the speed of soil cultivation, which will correspond to the power of the OKA and the mounted mechanism itself.
Conclusion
When choosing equipment for processing land plots for planting potatoes and other crops, you should not save on the walk-behind tractor itself, but you can save on hinged mechanisms. You can make them yourself. The advantage of a hand-assembled walk-behind tractor is the ability to use parts from equipment that is no longer in use: you can use the discs of an old seeder, saw blades, stubble plows and other equipment.